Overview of Integration
We have partnered with Workday to provide ATSi Apply solution which lets jobseekers apply seamlessly for jobs posted on Stepstone Group job boards. All applications will be landing straight in the client’s Workday tenant instance, with confirmation of the source of this application.
Design Approved
The Workday Design Approved badge is awarded to Silver level partners based on the review of an approved use case and proposed reference architecture for their integration.
How does this work?
A client, using Workday’s Recruiting functionalities from the HCM module, can create job requisitions for their vacancies and advertise the corresponding job postings on the built-in External Careers site:
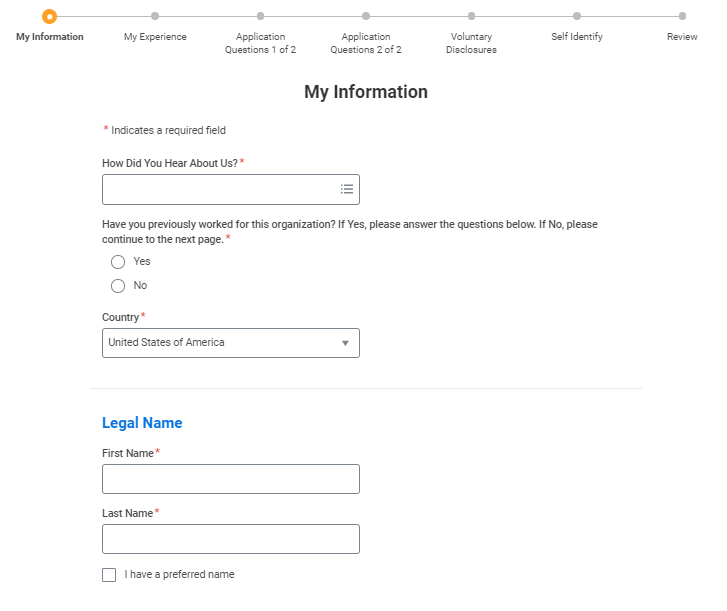
The job postings on the external career site allow the job seeker to apply for the vacancies using the apply forms like the one below:
At the same time, the client can advertise links to such job postings on one of the job boards in the StepStone group.
The aim of ATSi Apply – Workday integration is to let the job seeker apply for such job postings as easy as possible, ideally directly on the job board, because it increases the conversion dramatically.
To achieve this goal, ATSi Apply solution tries to resemble the Workday’s External Careers site application process on the job board. A job seeker is asked to fill-in all the data needed to make the application happen and the moment the job seeker clicks the Apply button on the job board, the data is transferred to client’s Workday tenant using the web services.
What are the capabilities?
The following table shows, out of all the known features of the recruiting process in Workday and parts of the apply forms on the External Careers site, what is currently supported by the integration. The features are grouped by the steps of the original application process on the External Careers site.
| Step | Field | Support |
|---|---|---|
| My Information | Legal Name (First / Last Name) | ✓ |
| Email Address | ✓ | |
| How Did You Hear About Us? | ✓ | |
| Former Worker Fields | ✗ | |
| Country | ✓ | |
| Preferred Name (First / Last Name) | ✗ | |
| Address | ✓ | |
| Phone | ✗ | |
| My Experience | Resume/CV | ✓ |
| Education | ✗ | |
| Certification | ✓ | |
| Languages | ✓ | |
| Skills | ✗ | |
| Work Experience | ✓ | |
| Websites | ✓ | |
| Social Network URLs | ✗ | |
| Application Questions (Primary / Secondary) | Text Questions | ✓ |
| Date Questions | ✓ | |
| Numeric Questions | ✓ | |
| Select Questions | ✓ | |
| Multi-select Questions | ✓ | |
| Attachment Questions | ✓ | |
| Branching Questions | ✓ | |
| Voluntary Disclosures | Terms and Conditions | ✓ |
| Gender | ✓ | |
| Ethnicity | ✓ | |
| Veteran Status | ✓ | |
| Self Identify | Disability | ✓ |
| Account Creation | Account Creation | ✗ |
Requirements
To activate ATSi, clients are required to provide the following information from Workday:
- Workday Organisation ID
- Link to job requisition in Workday tenant
- Source Reference ID value(s) (see Step 1 below)
- Username and password (see Step 2 below)
- Public Web Services Endpoint (see Step 13 below)
- Link to Privacy Policy (see Step 15 below)
- Confirmation integration user has been added to your authentication policy (see Step 16 below)
You will find this information, as well as further explanations for each point, by following the instructions further below in your Workday ATS.
Please send the above information to one of the following contacts, depending on your job board:
| Country | Job Board | Contact Email Address |
| Continental Europe | Stepstone DE | connect@stepstone.com |
| UK | Totaljobs, Caterer, CWJobs, Jobsite | connectuk@thestepstonegroup.com |
| Ireland | Irishjobs, Jobs.ie, NIJobs | connectuk@thestepstonegroup.com |
Please note, that administration access is required to enable you to complete these steps.
Steps to integrate and enable
Step 1: Recruiting Sources
Here we will check that the Stepstone job board is set up as a recruiting source and if not, add it.
This will ensure every application made through the integration is attributed to our job board.
To check this, follow the steps below for every relevant job board:
- As an admin user choose “Maintain Recruiting Sources” task:

- Check the job board is set up in the Source field i.e StepStone, Totaljobs
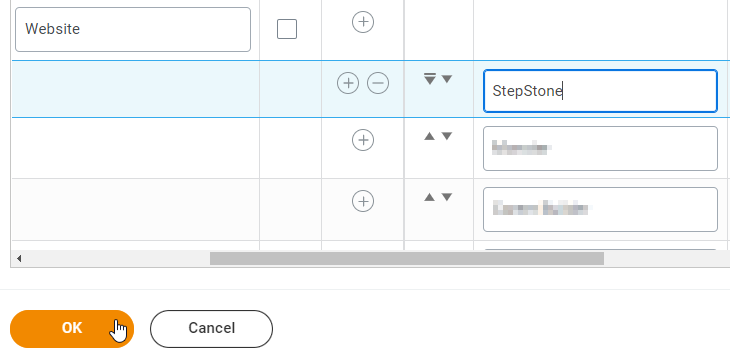
- If the job board does not appear, click on the + icon to add a new entry under the “Website” category.
- Once confirmed / added, click OK then Done.
- Next, choose “Maintain Reference IDs” task:

- In the “Business Object” field, choose “Applicant Source” and click OK:
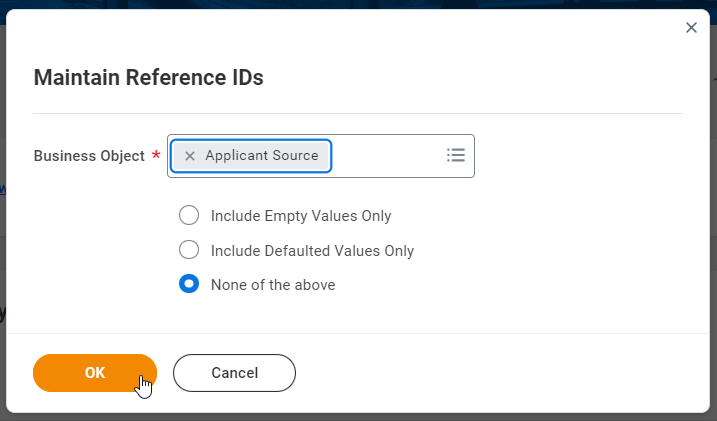
- Click OK again on the screen with the number of results.
- Find the relevant job board entry and amend the “Reference ID Value” to the job board name, then click OK.
- Click Done.
- Repeat the above steps for any other relevant job board with the Stepstone Group the integration will be made live for.
- Copy the “Reference ID Values” and save them for later.
Step 2: Add Integration User
Here, we will set up an integration user to enable the access between systems.
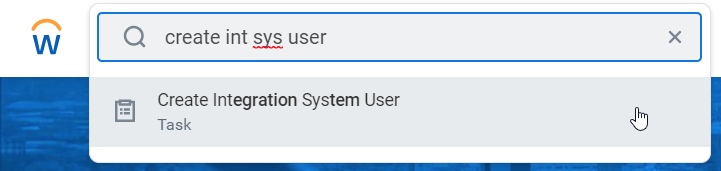
- As an admin user choose “Create Integration System User” task:
- Type in “atsi” in the “User Name” field.
- Set a password for the user in fields “New Password” and “New Password Verify“.
- Click OK.
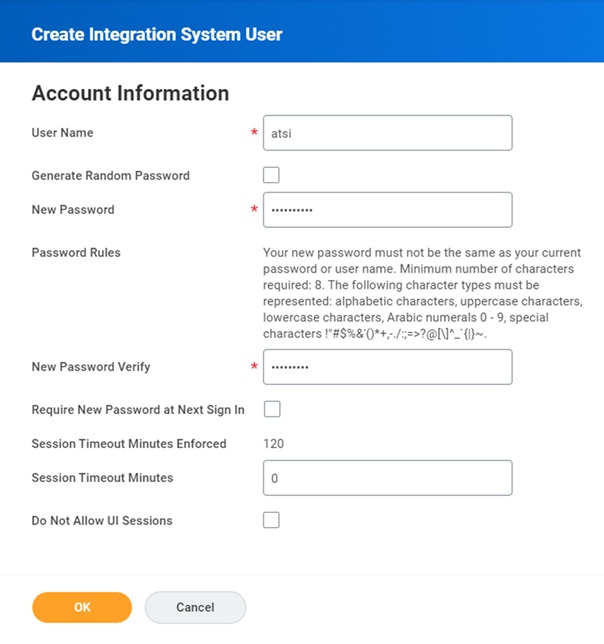
- Save this password value for later access as Integration System User (ISU).
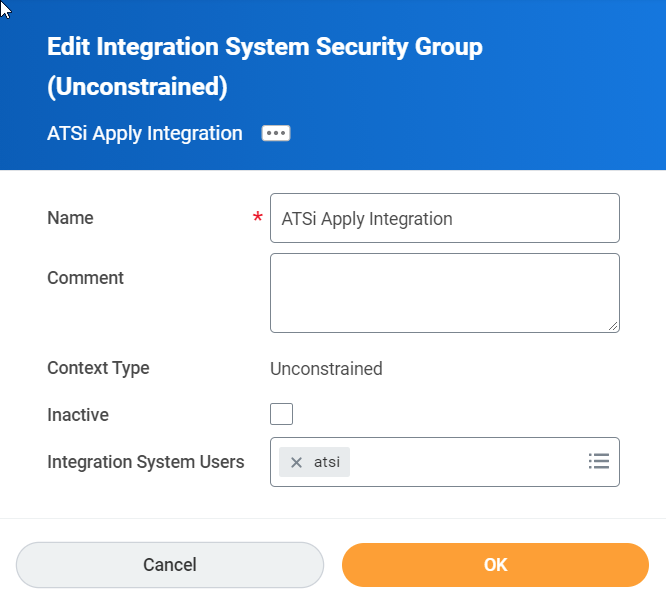
Step 3: Create Security Group
Here we will set up a security group to add the integration user to.
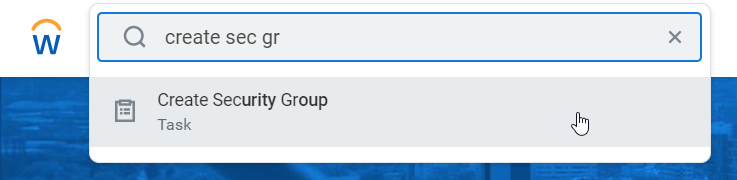
- As an admin user, choose “Create Security Group” task.
- Choose “Integration System Security Group (Unconstrained)” as the Type of Tenanted Security Group.
- Type in “ATSi Apply Integration” as the name of the group.
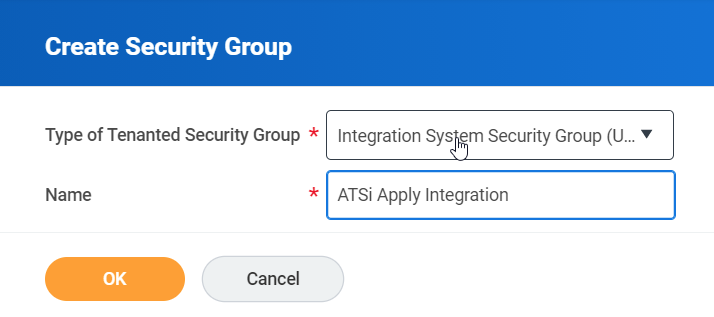
- Click OK.
- Add the “atsi” user in the “Integration System Users” field.
- Click OK and then click Done.
Step 4: Get Job Requisition Permission
Here we will add the permission to call Recruiting / Get Job Requisitions web service.
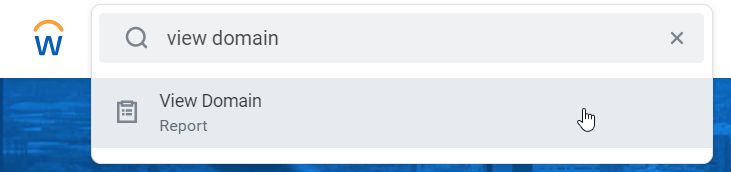
- As an admin user choose “View Domain” report.
- Choose “Job Requisition Data” domain and click OK.
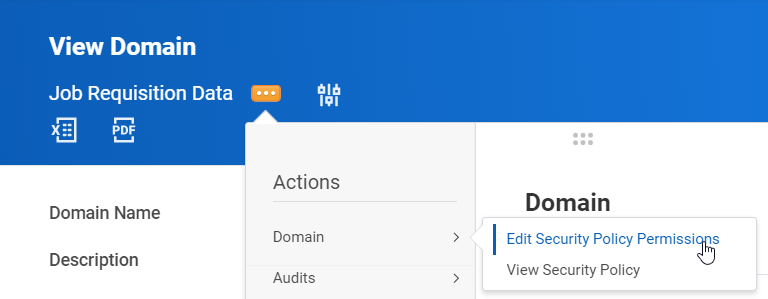
- Click related actions of “Job Requisition Data” then choose “Domain / Edit Security Policy Permissions“.
- On the “Edit Domain Security Policy Permissions” page scroll down to the “Integration Permissions” table and click + button.

- Add ATSi Apply Integration group in the “Security Groups” column of the newly added row and check the “Get” permission.

- Click OK then click Done.
Step 5: Get Evergreen Requisition Permission
Here we will add the permission to call Recruiting / Get Evergreen Requisitions web service.
- As an admin user choose “View Domain” report.
- Choose “Manage: Evergreen Requisitions” domain and click OK.
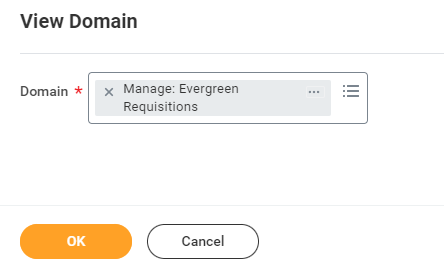
- Click related actions of “Manage: Evergreen Requisitions” then choose “Domain / Edit Security Policy Permissions“.
- On the “Edit Domain Security Policy Permissions” page scroll down to the “Integration Permissions” table and click + button.
- Add ATSi Apply Integration group in the “Security Groups” column of the newly added row and check the “Get” permission.
- Click OK then click Done.
Step 6: Put and Get Candidate Permission
Here we will add the permission to call Recruiting / Put Candidate web service.
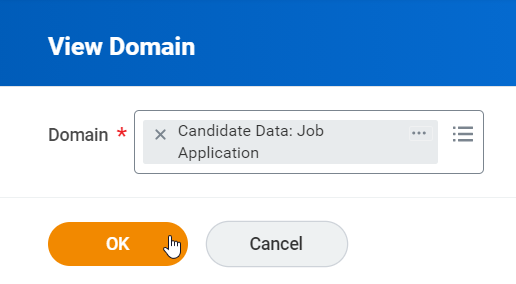
- As an admin user choose “View Domain” report.
- Choose “Candidate Data: Job Application” domain and click OK.
- Click related actions of “Candidate Data: Job Application” then choose “Domain / Edit Security Policy Permissions“.
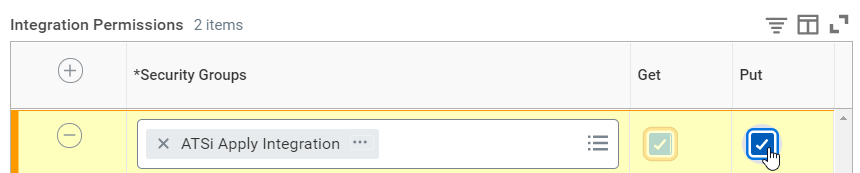
- On the “Edit Domain Security Policy Permissions” page scroll down to the “Integration Permissions” table and click + button.
- Add ATSi Apply Integration group in the “Security Groups” column of the newly added row and check the “Put” and “Get” permission.
- Click OK then click Done.
Step 7: Get Questionnaires Permission
Here we will add the permission to call Recruiting / Get Questionnaires web service and to use Questionnaires data source in reports.
- As an admin user choose “View Domain” report.
- Choose “Questionnaire Creation and Distribution” domain and click OK.
- Click related actions of “Questionnaire Creation and Distribution” then choose “Domain / Edit Security Policy Permissions“.
- On the “Edit Domain Security Policy Permissions” page scroll down to the “Integration Permissions” table and click + button.
- Add ATSi Apply Integration group in the “Security Groups” column of the newly added row and check the “Get” permission.
- Click OK then click Done.
Step 8: Get Integration Build Permission
Here we will add the permission to call Integrations / Get References web service.
- As an admin user choose “View Domain” report.
- Choose “Integration Build” domain and click OK.
- Click related actions of “Integration Build” then choose “Domain / Edit Security Policy Permissions“.
- On the “Edit Domain Security Policy Permissions” page scroll down to the “Integration Permissions” table and click + button.
- Add ATSi Apply Integration group in the “Security Groups” column of the newly added row and check the “Get” permission.
- Click OK then click Done.
Step 9: Get Job Requisitions for Recruiting Permission
Here we will add the permission to call Recruiting / Get Candidate web service
- As an admin user choose “View Domain” report.
- Choose “Job Requisitions for Recruiting” domain and click OK.
- Click related actions of “Job Requisitions for Recruiting” then choose “Domain / Edit Security Policy Permissions“.
- On the “Edit Domain Security Policy Permissions” page scroll down to the “Integration Permissions” table and click + button.
- Add ATSi Apply Integration group in the “Security Groups” column of the newly added row and check the “Get” permission.
- Click OK then click Done.
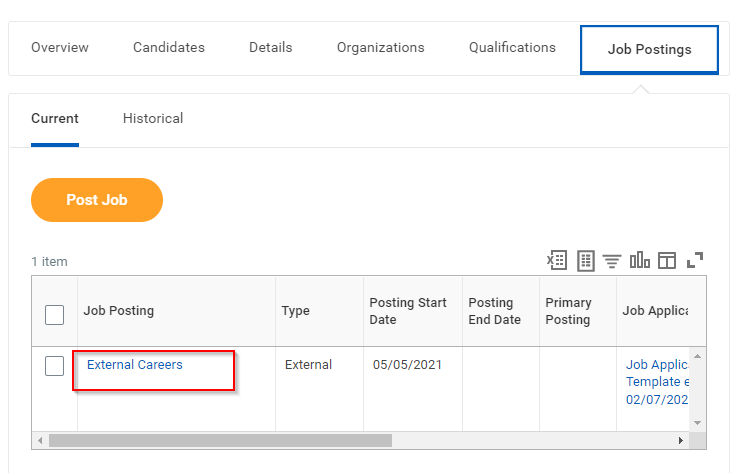
Step 10: Get and view Job Posting for Report/Task Permissions
Here we will add the permission to view / get Job Postings posted to your internal / external career sites.
- As an admin user choose “View Domain” report.
- Choose “Job Postings” domain and click OK.
- Click related actions of “Job Postings” then choose “Domain / Edit Security Policy Permissions“.
- On the “Edit Domain Security Policy Permissions” page scroll down to the “Integration Permissions” table and click + button.
- Add ATSi Apply Integration group in the “Security Groups” column of the newly added row and check the “View” permission.
- Click OK then click Done.
- Go back to “View Domain” report.
- Choose “Job Postings: External” domain and click OK.
- Click related actions of “Job Postings: External” then choose “Domain / Edit Security Policy Permissions“.
- On the “Edit Domain Security Policy Permissions” page scroll down to the “Integration Permissions” table and click + button.
- Add ATSi Apply Integration group in the “Security Groups” column of the newly added row and check the “Get” permission.
- Click OK then click Done.
Step 11: Enable OAuth Authorization
To enable OAuth authorization you will get a Redirection URI from Stepstone Group.
Register API Client:
Type in „Register API Client“ in your Workday search bar and open it.

You have to enter the following information:
- Client Name: E.g. “Stepstone OAuth”
- Client Grant Type: Select “Authorization Code Grant”
- Access Token Type: Select “Bearer”
- Redirection URI: Insert value from Stepstone Group
- Non Expiring Refresh Tokens: Please check.
- Scope (Functional Areas): You can find them under “Custom Objects”
- Integration
- Pre-Hire Process
- System
- Tenant Non-Configurable
- Recruiting
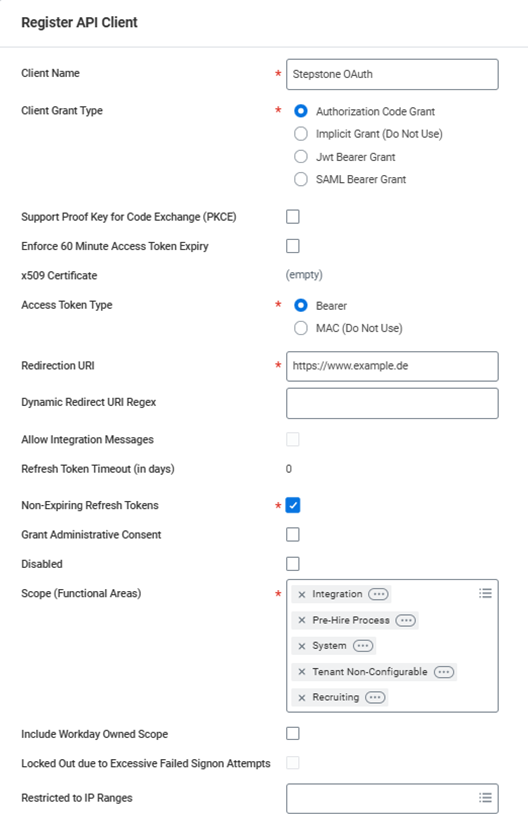
Click on „OK“
Please provide the following information to Stepstone Group.
- Client ID
- Client Secret
- Workday REST API Endpoint
- Token Endpoint
- Authorization Endpoint
You will receive an authorization URL from Stepstone Group. Please access the provided link while logged in as Integration System User you created before.
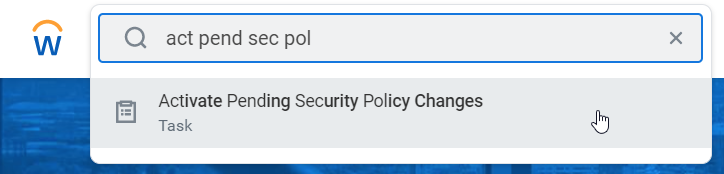
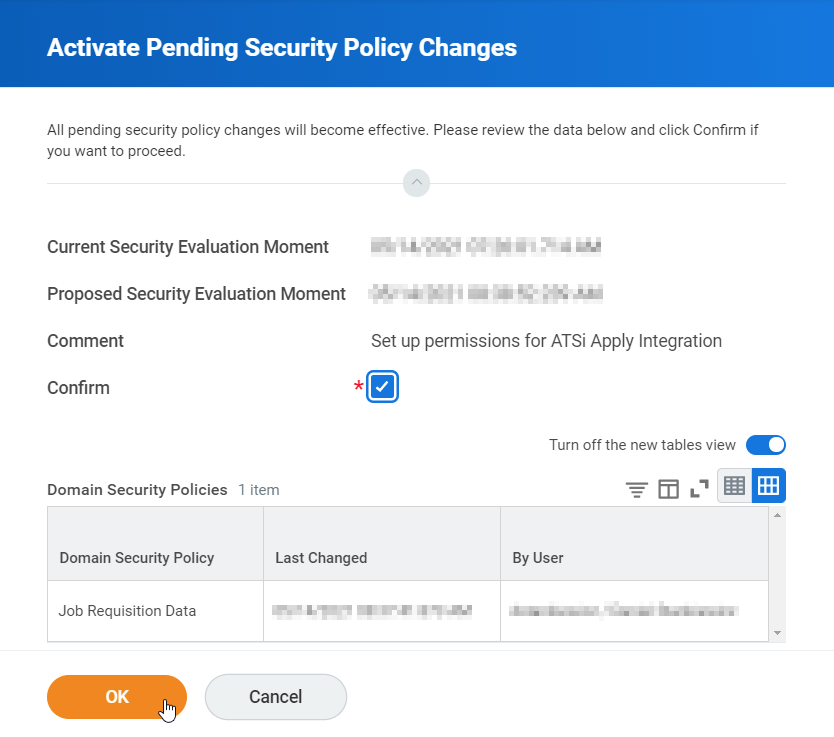
Step 12: Activate Pending Security Policy Changes
- As an admin user choose “Activate Pending Security Policy Changes” task.
- Enter an appropriate comment for the change, e.g. “Set up permissions for ATSi Apply Integration” and click OK.
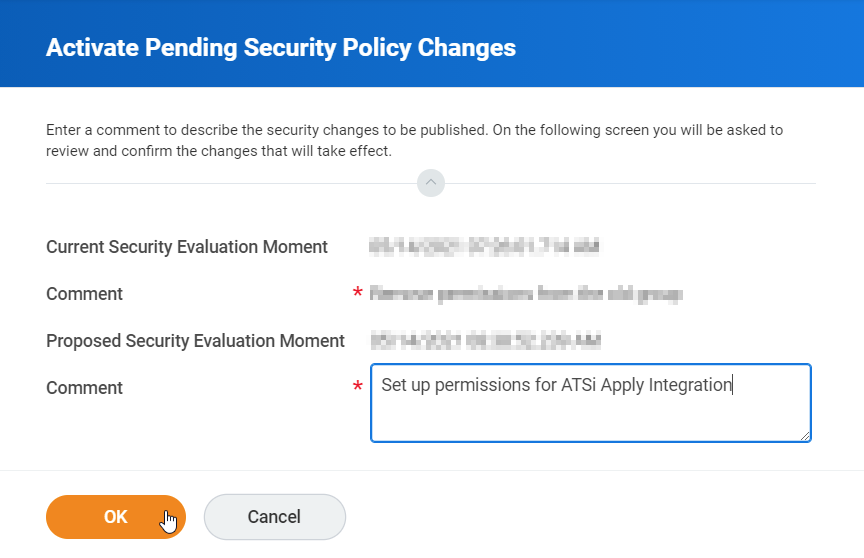
- Review the changes, tick Confirm checkbox and click OK.
Step 13: Get Public Web Services Endpoint
- As an admin user open “Public Web Services Report“.
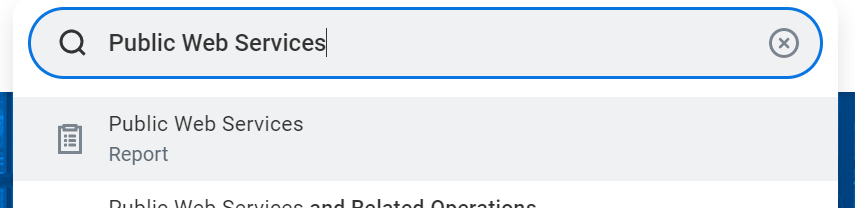
- Scroll down to “Recruiting (Public)“, click on three dots on the right-hand side > Web Service > View WSDL.

- Once you opened the WSDL scroll down to the bottom and copy the address under soapbind:address location.

- Save this URL to send with the other required information.
Step 14: Follow-up Emails
A candidate Workday account is not automatically created when a candidate applies to your job via ATSi Apply. A custom email notification should be configured with an account creation link. This will automatically associate the submitted application with the candidate’s Workday account.
In order to set up this notification, log in as an Admin user and follow these steps:
- In the search box of your Admin account, type “Business Process Definitions” and select the “Business Process Definitions report“.

- In the “Business Process Type” column, find “Job Application” and click the “…” icon.
- Hover over Business Process in the Actions menu and select “Add Notification“.
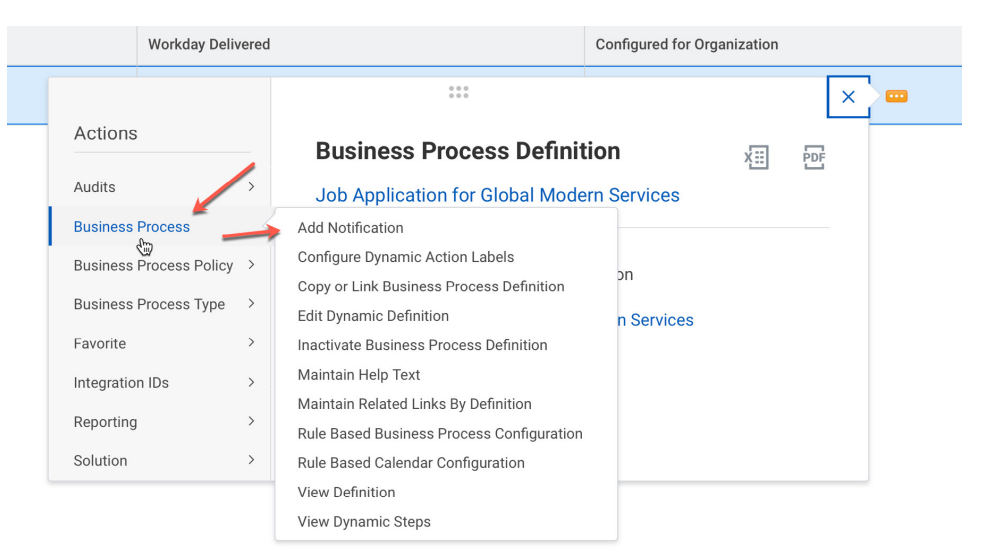
- Press OK in the next pop up.
- Set up the notification by following the steps below:
- Override Email Template: select the Email Template to override e.g. Job Application Email Template.
- Tick the “Do Not Include Notification Details Link” box if the notification recipients don’t have Workday accounts.
- Triggers: select “On Entry” and enter “b-Review Candidate”
- This means the trigger should work right after the job application is created for the candidate)
- Conditions and Rules: type in the Rule field and select: “Candidate Home Account URL” is not blank.
- the rule means that no home account is created for the job seeker within your Workday.
- Recipients: Under Groups, set the recipient as “Candidate as Self“.
- Set up the Message Content as you see fit.
- Under Body, ensure that the Field “Create Candidate Home Account URL” is added.
- Click OK.
- Review the notification setup and click Done.
We will test these notifications when we have configured the integration.
Step 15: Privacy Policy
Due to some laws protecting the job seeker’s personal data, e.g. General Data Protection Regulation, ATSi Apply should not sent any applicant data until they consent to the Privacy Policies of the party that is going to store the data, in this case the client owning the Workday’s tenant instance.
As part of the integration, ATSi will display a clickable link to candidates to allow them to view the Privacy Policy before they submit their application. This will also make them aware that by applying for this job they consent to the displayed policy.
To achieve such behavior of the apply process, the client needs to provide ATSi Apply with the URL to the Privacy Policies and the legal name of the company that is the owner of the policy. The currently used Privacy Policies can be checked in the client’s tenant by following the steps below:
- As an admin user, open the “Edit Tenant Setup – Recruiting” task.
- Find the Privacy Policy Link URL.

- Save this URL to send with the other required information.
Step 16: Authentication Policy
To enable the integration to work, it is important to ensure that the access is not getting blocked by any authentication policies built into Workday.
We advise to check any such policies that are set up and add the “atsi” user to the whitelist.
Requirements Revisited
You should now have all the following information after processing the steps above:
- Workday Organisation ID
- Link to job requisition in Workday tenant
- Source Reference ID value(s) (see Step 1)
- Username and password (see Step 2)
- Public Web Services Endpoint (see Step 13)
- Link to Privacy Policy (see Step 15)
- Confirmation integration user has been added to your authentication policy (see Step 16)
Please send the above information to one of the following contacts, depending on your job board:
| Country | Job Board | Contact Email Address |
| Continental Europe | Stepstone DE | connect@stepstone.com |
| UK | Totaljobs / Caterer / Jobsite | connectuk@thestepstonegroup.com |
| Ireland | Irishjobs, Jobs.ie, NIJobs | connectuk@thestepstonegroup.com |
Once we have received the above information, we will proceed with testing.
Testing Process
Testing Tenant
We advise to test in your preferred tenant, before moving into Production i.e sandbox, preview, preprod or implementation.
A consideration for the tenant used to test is the automatic refresh. If using a tenant with this in place, there are a couple of options to help ensure we have enough testing time.
- Pause the refresh
- Build in a tenant that the refresh tenant mirrors.
- Here we will then use the refresh tenant credentials to test in.
End-to-end Test
Once we have the necessary information from the requirements above, we will follow the steps below:
- Configure the integration within our internal system.
- Set up a test job, using the job requisition URL provided.
- This will be set up on a test account and not use your account credits.
- Apply for the job as a candidate.
- Test the screening questions are pulling through correctly, by cross-referencing with the Workday careers apply page.
- Send an application into Workday.
- Advise application has been sent and ask you to confirm that the application and source has come through as expected.
Considerations:
- If we have any issues throughout this process, we will feedback to you in the first instance.
Go Live
Once testing has been completed in all tenants, we will await your confirmation to go live with the integration.
At this point, we will turn this on for all live jobs on your account.